UE5之横版2D游戏(一)
也算是一边看文档和各种教程,一边用蓝图做了一个简单的demo出来,不过还是感觉很多东西的云里雾里的,正好打算把部分蓝图内容转换为C++实现,所以趁这个机会记录一下
PaperCharacter
地图的制作感觉可以先放一放,因为整个流程还是比较简单的,主要就是素材的导入,给必要的Tile添加碰撞,然后自由组合即可,等后续需要和角色产生交互再统一记录吧,所以这里就先记录一下角色制作的一些关键流程
Enhanced Input
以前处理输入主要依赖于轴映射输入,但现在UE5更推荐使用增强输入来处理,个人的理解是增强输入可以解耦输入操作的逻辑,以组合的形式提高灵活性和复用性。不过我自己也没有详细了解过增强输入系统,所以就不展开介绍原理了,只简单记录一下如何使用
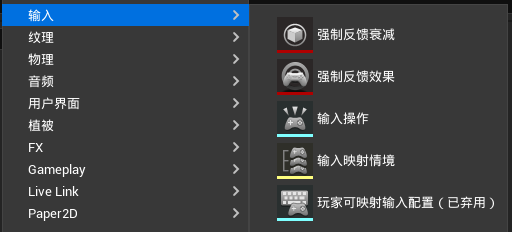
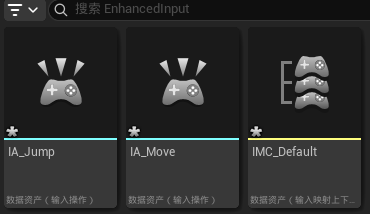
横板2D游戏的移动比较简单,最基础的就是左右移动和跳跃,所以就先从这两个最基础的Action开始,首先从InputMappingContext和InputAction创建IMC_Default、IA_Move和IA_Jump
然后在IMC_Default中完成配置 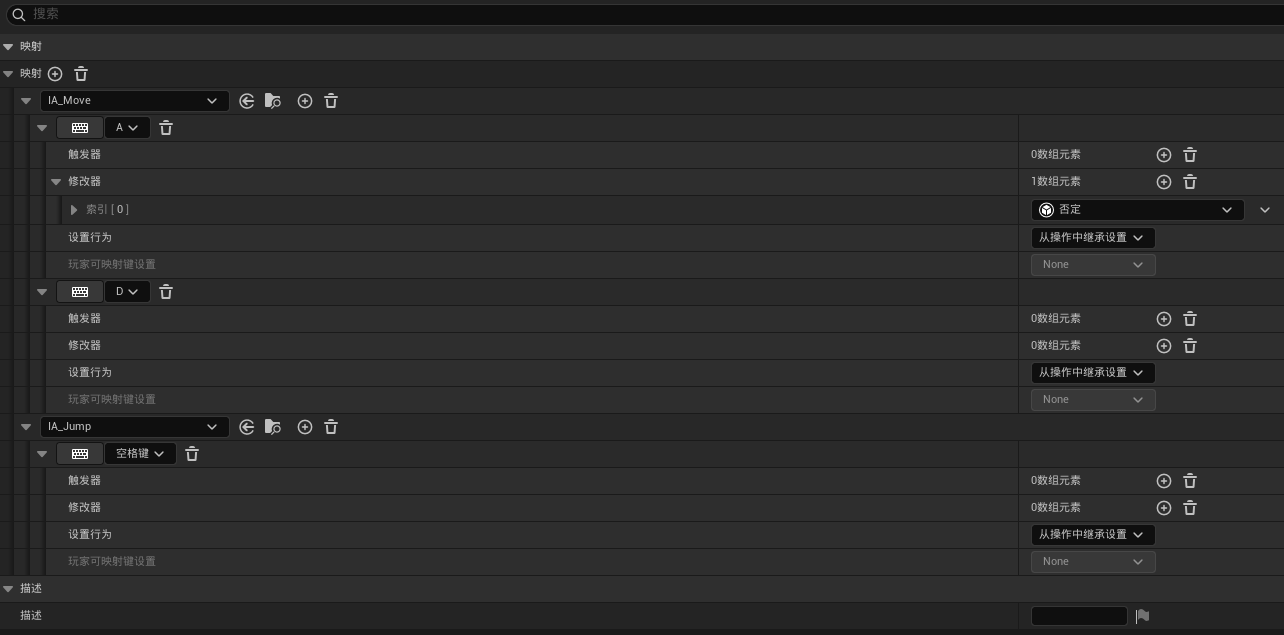
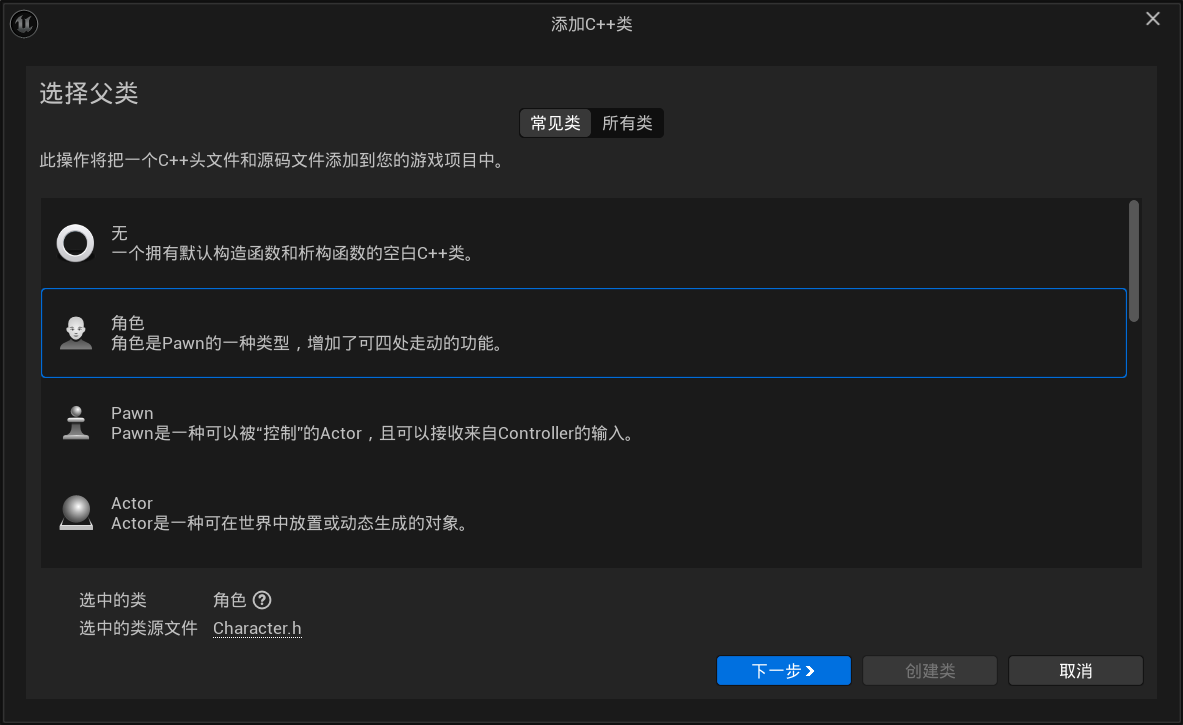
接下来创建一个C++类用于表示游戏中的角色,这里暂时使用默认的Character,因为2D角色主要就是把骨骼组件改为成了Sprite,动画组件变为FlipBook,其余地方没有太多区别,而正式创建2D角色会用到PaperZD这个插件,所以就先用默认的Character展示
我们需要实现Move和Jump的逻辑,然后把相应的资源和逻辑载入到输入增强系统中,所以我们首先在头文件CharacterBase.h中声明相关变量和函数
1 |
|
然后在CharacterBase.cpp中完成相关逻辑(这里已经在构造函数中调整了胶囊组件和骨骼组件的部分配置,也可以延迟到在蓝图子类中设置),简单来说
- 对于
Move函数,由于是2D游戏,我们只需要控制角色在水平方向移动即可,假设我们的角色在X轴上移动,那么我们就可以不用关心Y轴和Z轴 - 对于
Jump函数,由于没有什么特殊需求,所以直接使用了默认的实现 - 最后,我们需要把Action和相应逻辑绑定,并加入到
增强输入系统中
下面是具体的代码 1
2
3
4
5
6
7
8
9
10
11
12
13
14
15
16
17
18
19
20
21
22
23
24
25
26
27
28
29
30
31
32
33
34
35
36
37
38
39
40
41
42
43
44
45
46
47
48
49
50
51
52
53
54
55
56
57
58
59
60
61
62// Fill out your copyright notice in the Description page of Project Settings.
// Sets default values
ACharacterBase::ACharacterBase()
{
// Set this character to call Tick() every frame. You can turn this off to improve performance if you don't need it.
PrimaryActorTick.bCanEverTick = true;
// 初始化胶囊组件
GetCapsuleComponent()->InitCapsuleSize(42.f, 96.0f);
// 设置骨骼网格组件并加载Asset
GetMesh()->SetRelativeLocation(FVector(0.0f, 0.0f, -90.0f));
GetMesh()->SetRelativeRotation(FRotator(0.0f, -90.0f, 0.0f));
GetMesh()->SetSkeletalMeshAsset(LoadObject<USkeletalMesh>(nullptr, TEXT("/Script/Engine.SkeletalMesh'/Game/Characters/Mannequin_UE4/Meshes/SK_Mannequin.SK_Mannequin'")));
}
// Called when the game starts or when spawned
void ACharacterBase::BeginPlay()
{
Super::BeginPlay();
}
// Called every frame
void ACharacterBase::Tick(float DeltaTime)
{
Super::Tick(DeltaTime);
}
// Called to bind functionality to input
void ACharacterBase::SetupPlayerInputComponent(UInputComponent* PlayerInputComponent)
{
Super::SetupPlayerInputComponent(PlayerInputComponent);
// 输入映射上下文
if (APlayerController* PC = Cast<APlayerController>(Controller)) {
if (UEnhancedInputLocalPlayerSubsystem* Subsystem = ULocalPlayer::GetSubsystem<UEnhancedInputLocalPlayerSubsystem>(PC->GetLocalPlayer())) {
Subsystem->AddMappingContext(InputMappingContext, 0);
}
}
// 绑定输入动作
if (UEnhancedInputComponent* EIComponent = Cast<UEnhancedInputComponent>(PlayerInputComponent)) {
EIComponent->BindAction(MoveAction, ETriggerEvent::Triggered, this, &ACharacterBase::Move);
EIComponent->BindAction(JumpAction, ETriggerEvent::Started, this, &ACharacterBase::Jump);
EIComponent->BindAction(JumpAction, ETriggerEvent::Completed, this, &ACharacter::StopJumping);
}
}
// 移动逻辑
void ACharacterBase::Move(const FInputActionValue& Value) {
FVector ForwardDirection = FVector(1.0f, 0.0f, 0.0f);
FVector2D MovementValue = Value.Get<FVector2D>();
AddMovementInput(ForwardDirection, MovementValue.X);
}
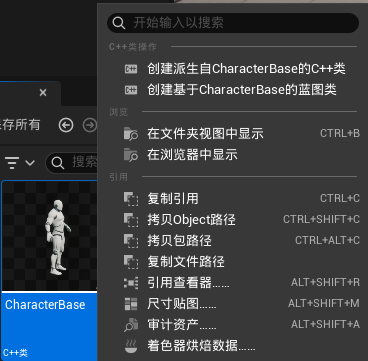
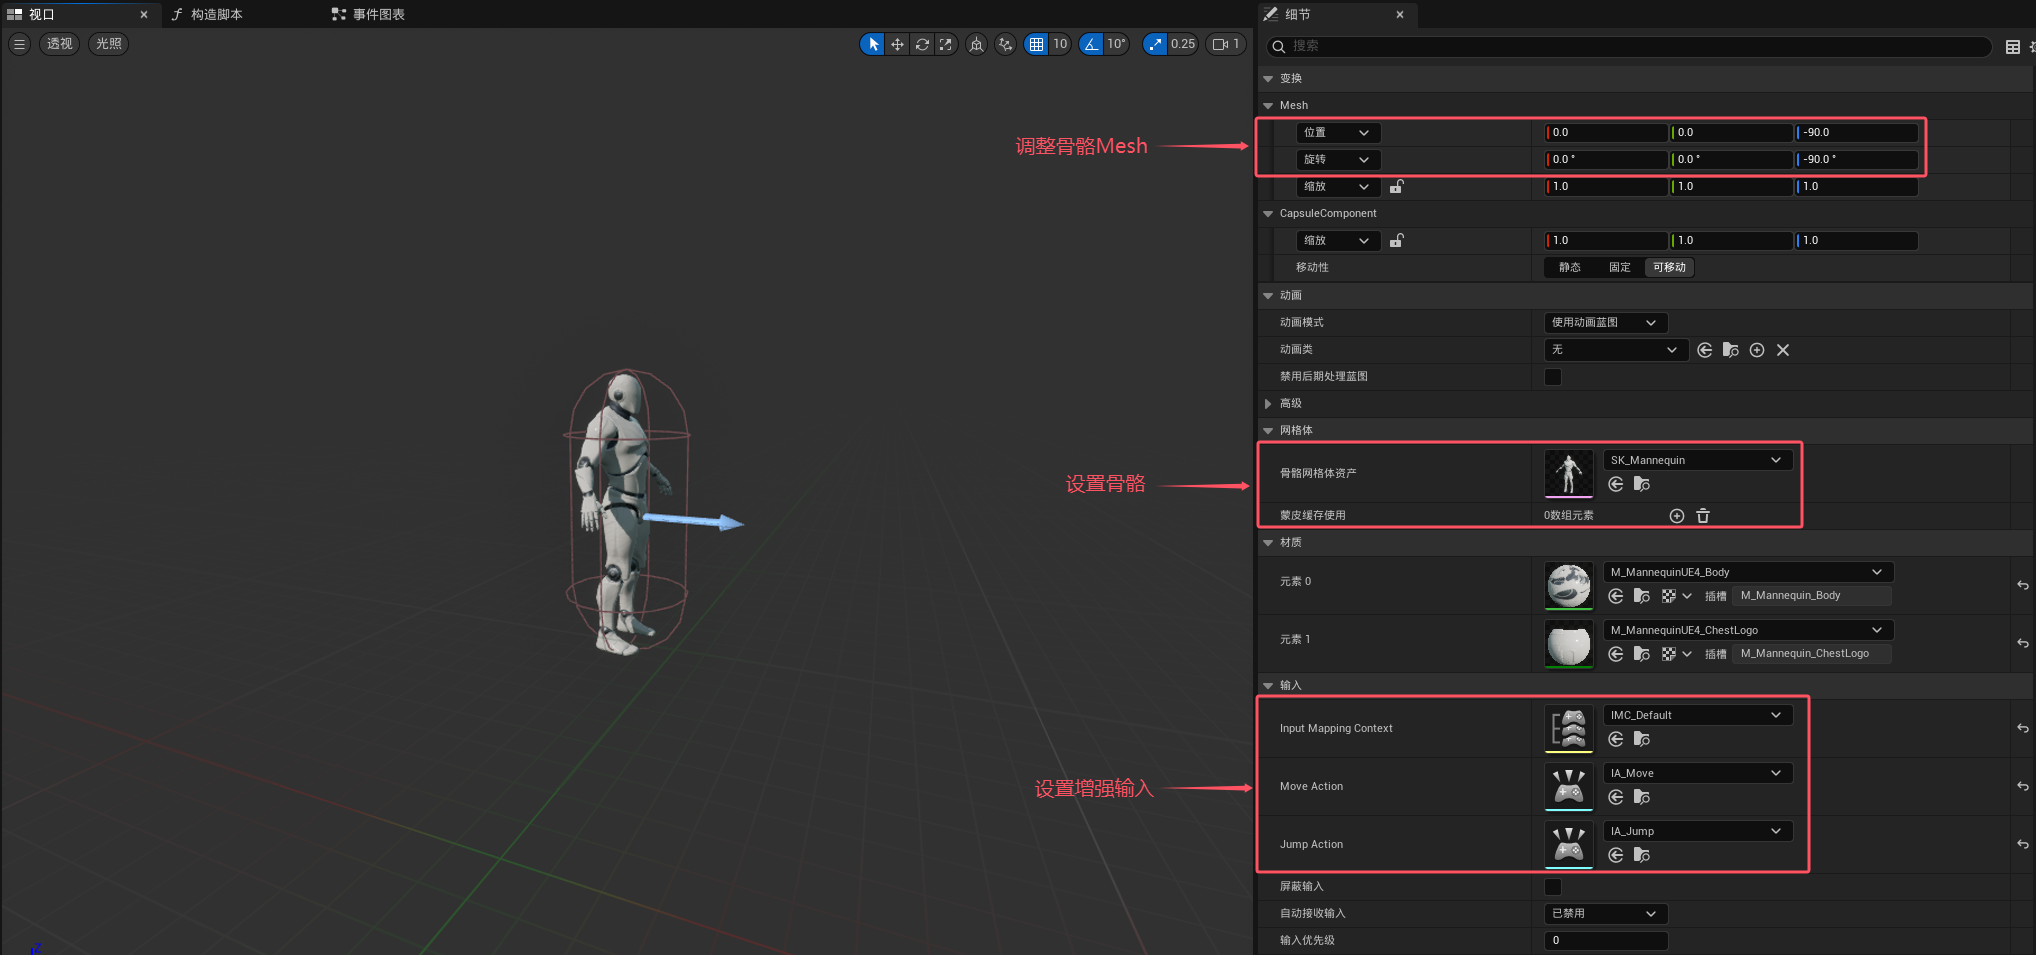
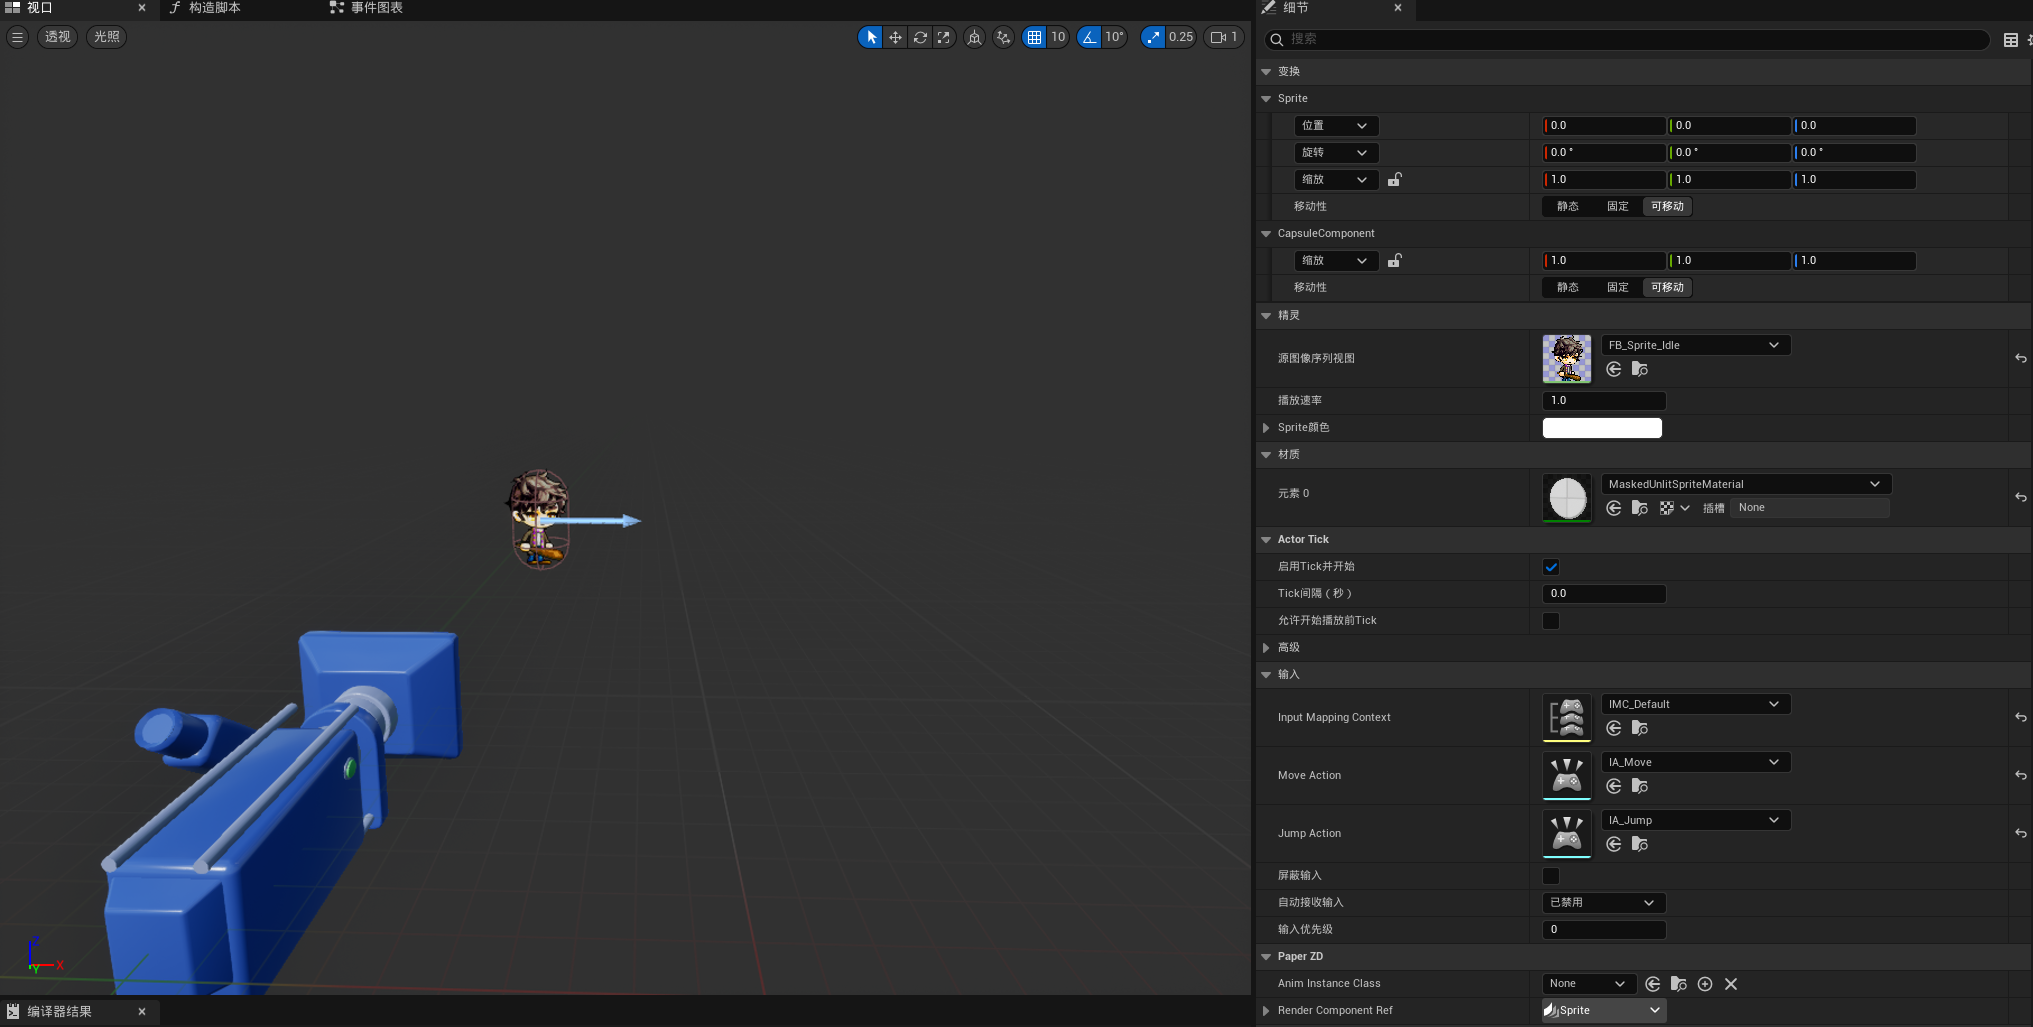
之后创建一个基于CharacterBase的蓝图类BP_CharacterBase,并添加之前制作好的IMC_Default、IA_Move和IA_Jump,因为我们没有用代码加载它们,所以需要手动设置一下(如果你之前没有用代码调整胶囊组件和骨骼组件的部分配置,那么也可以在这里设置)
然后在GameMode中指定BP_CharacterBase为默认的Pawn
1 | // AtestGameMode.h |
然后完成相关配置

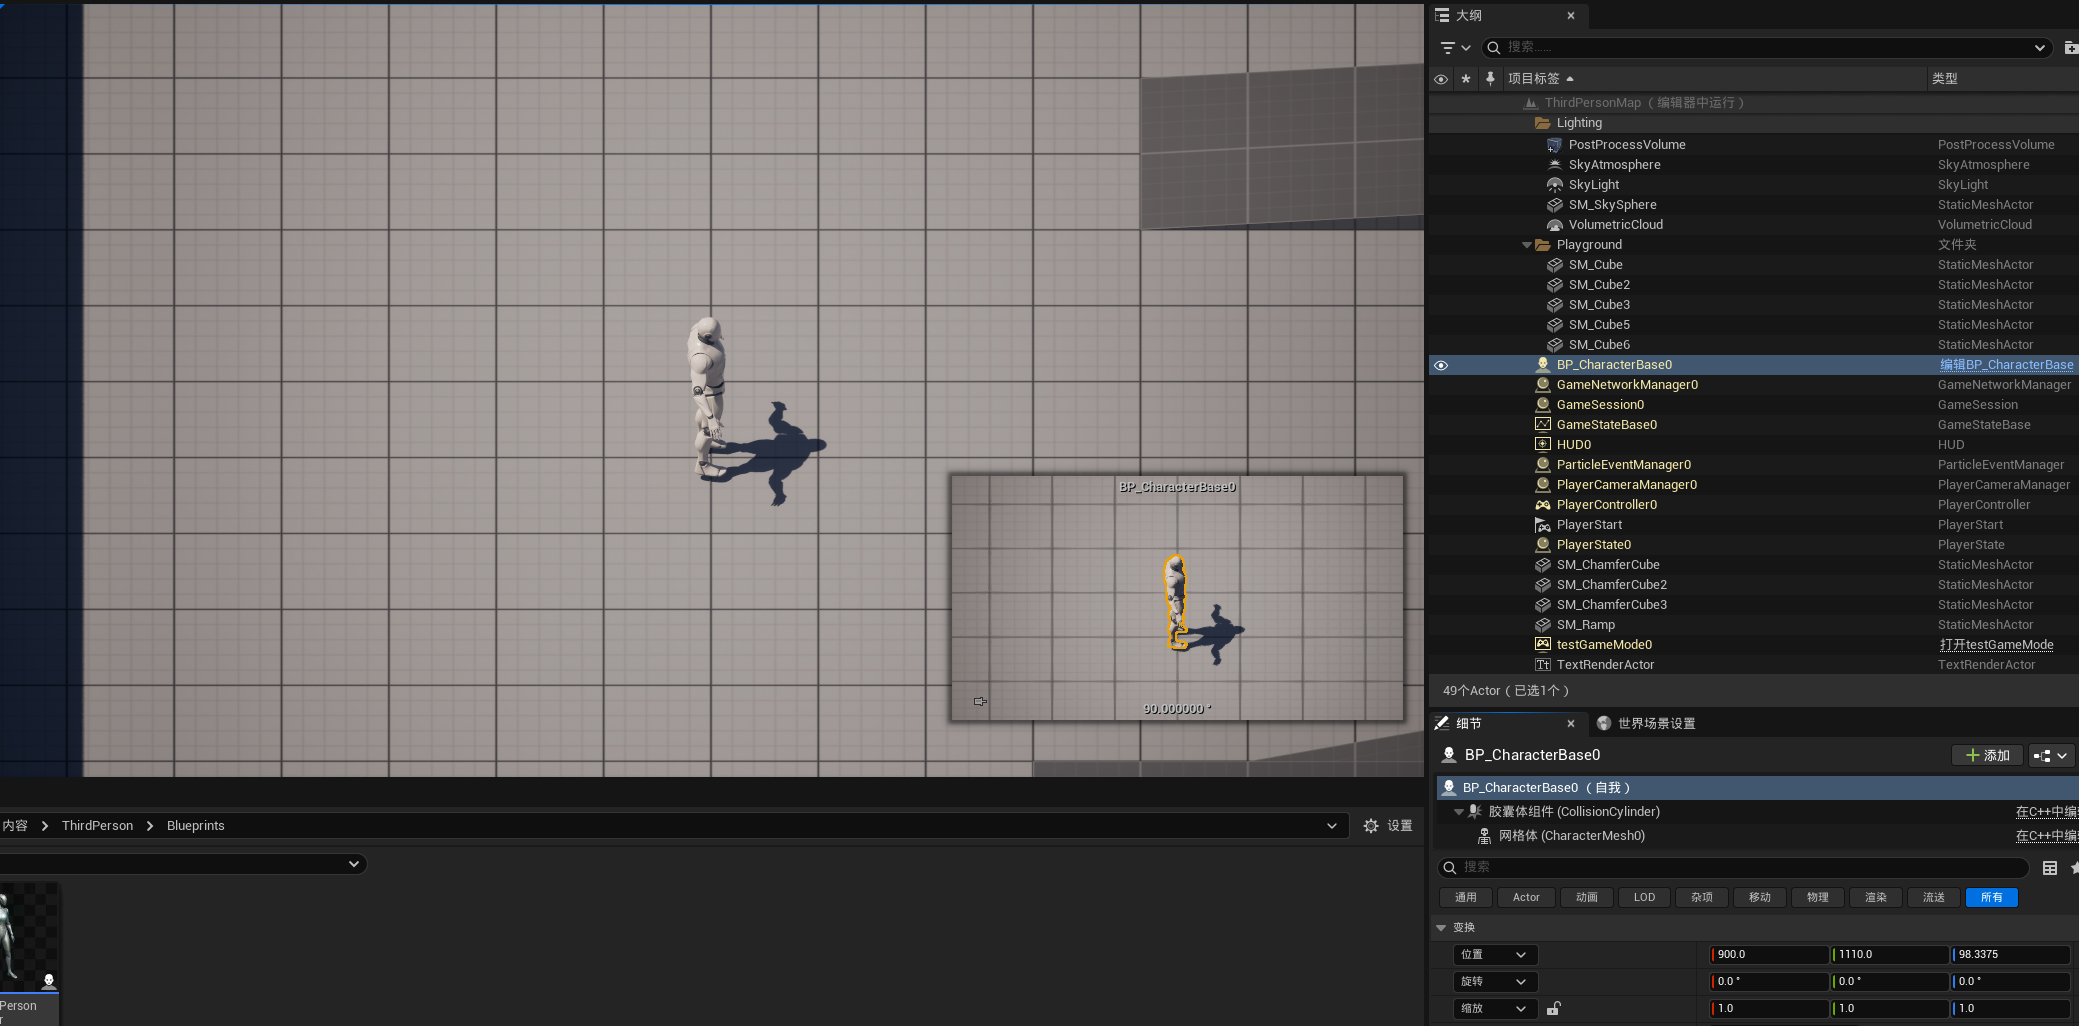
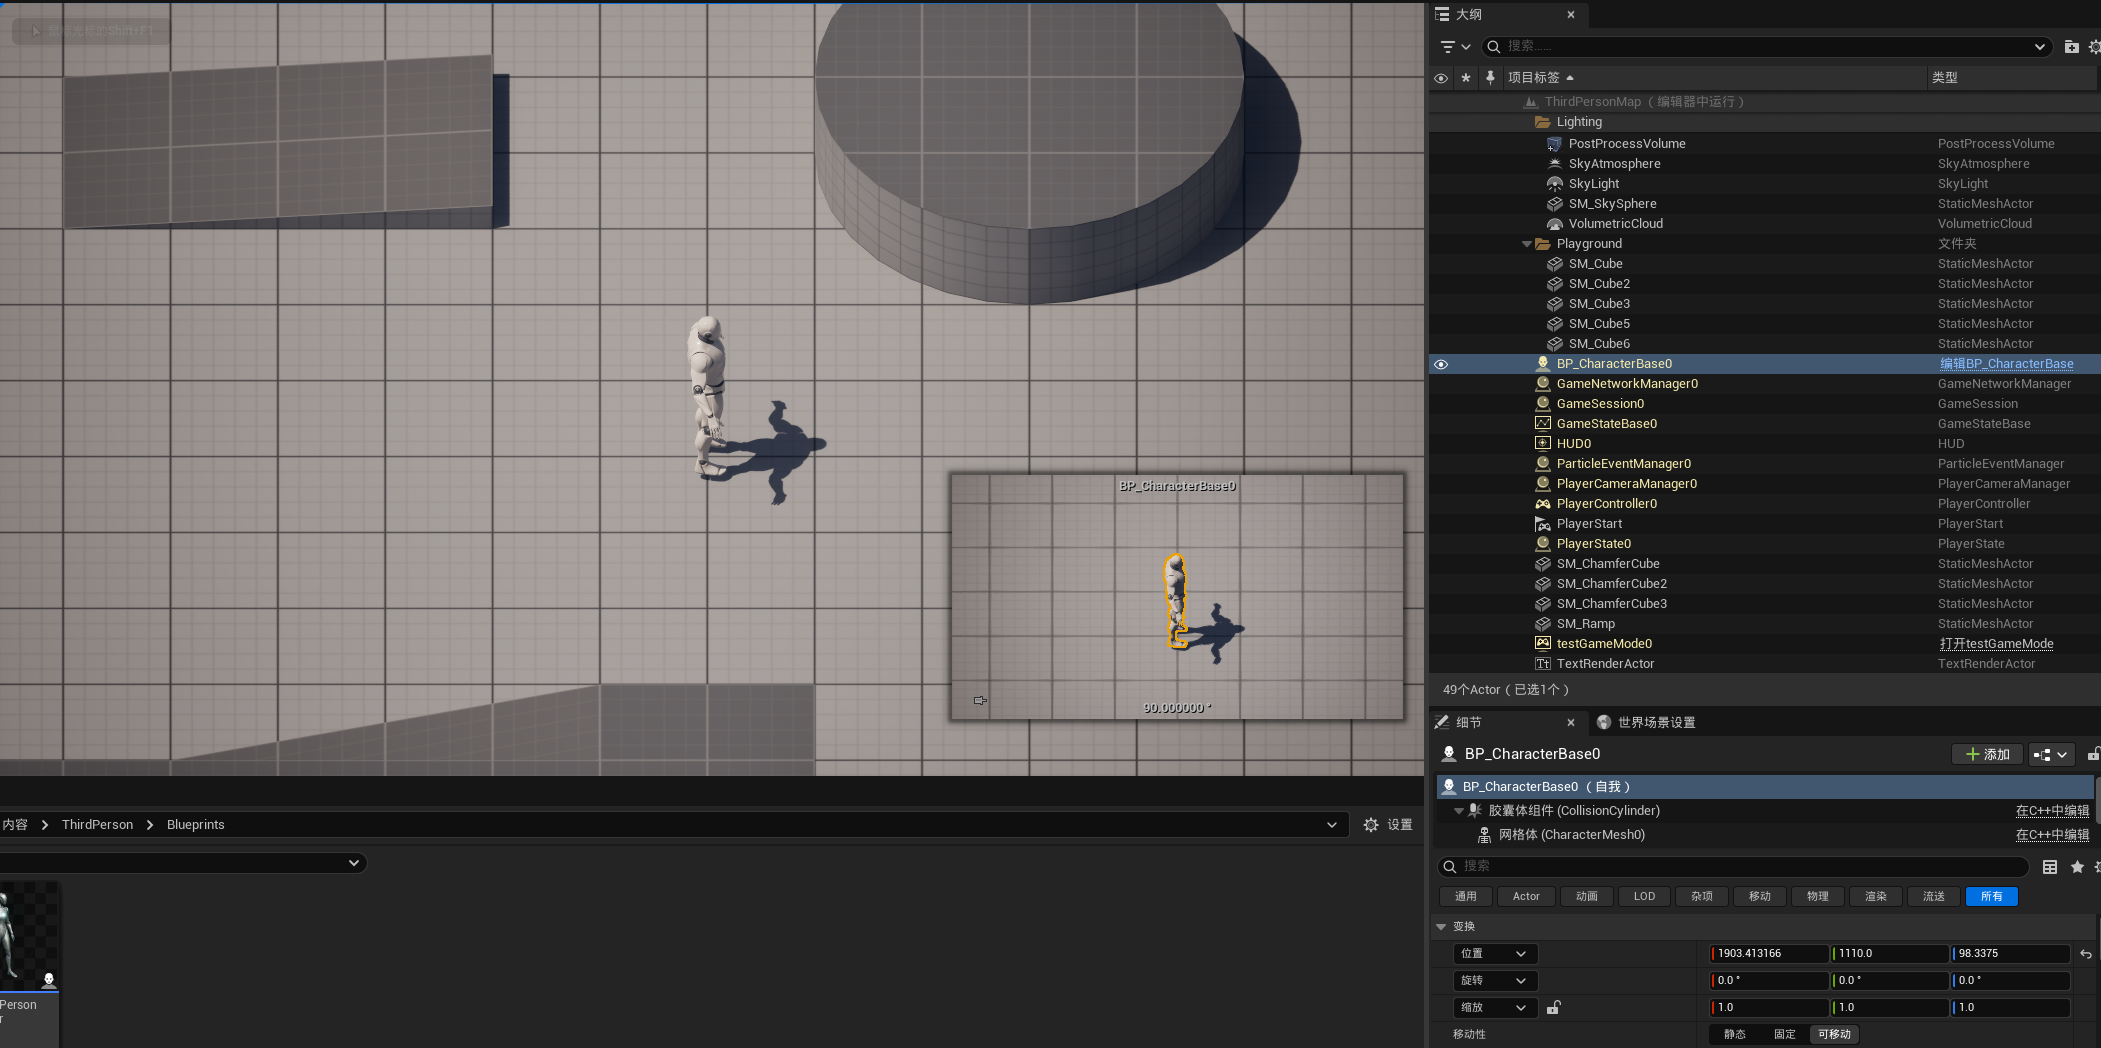
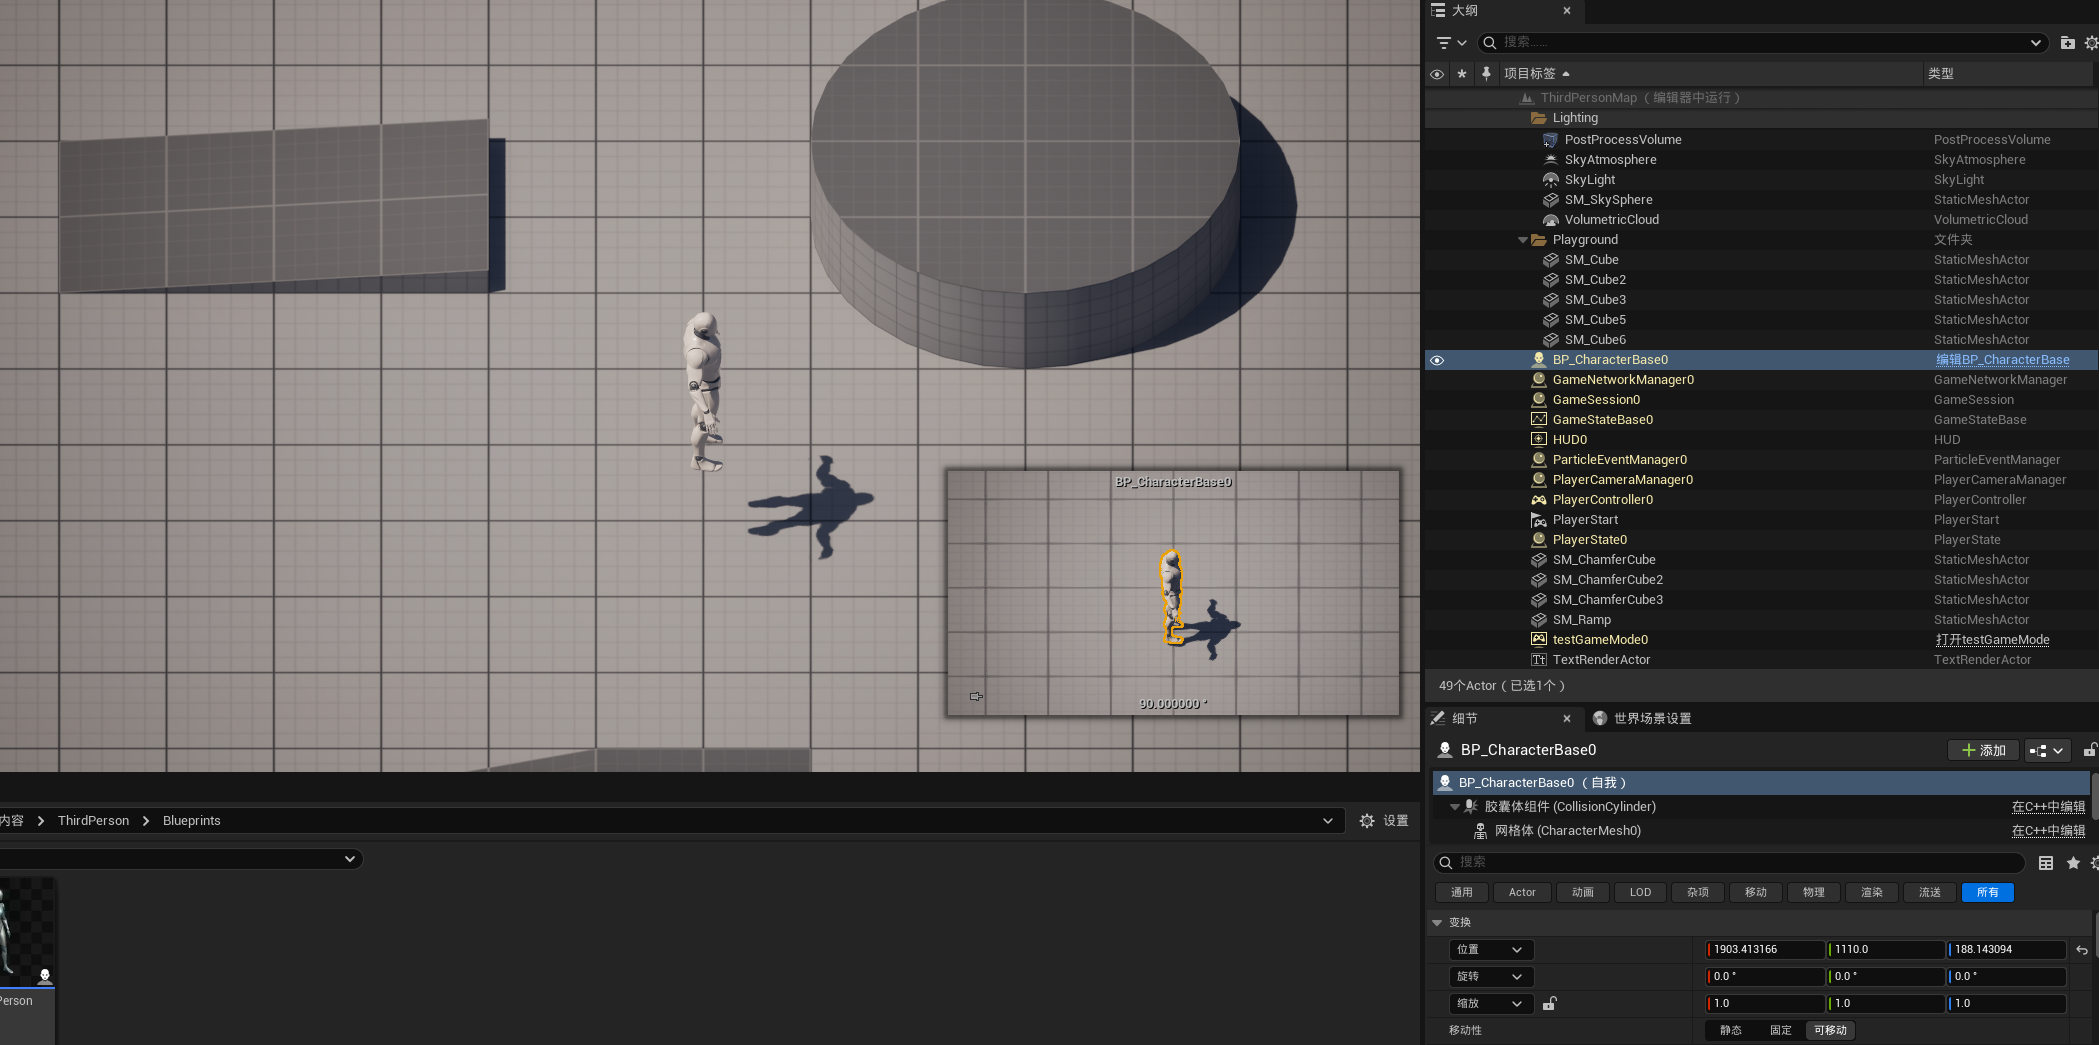
现在我们运行游戏,并选中角色以便观察位置的变化(此时还没有添加摄像机,所以看不到人物模型),然后按D试试能否移动
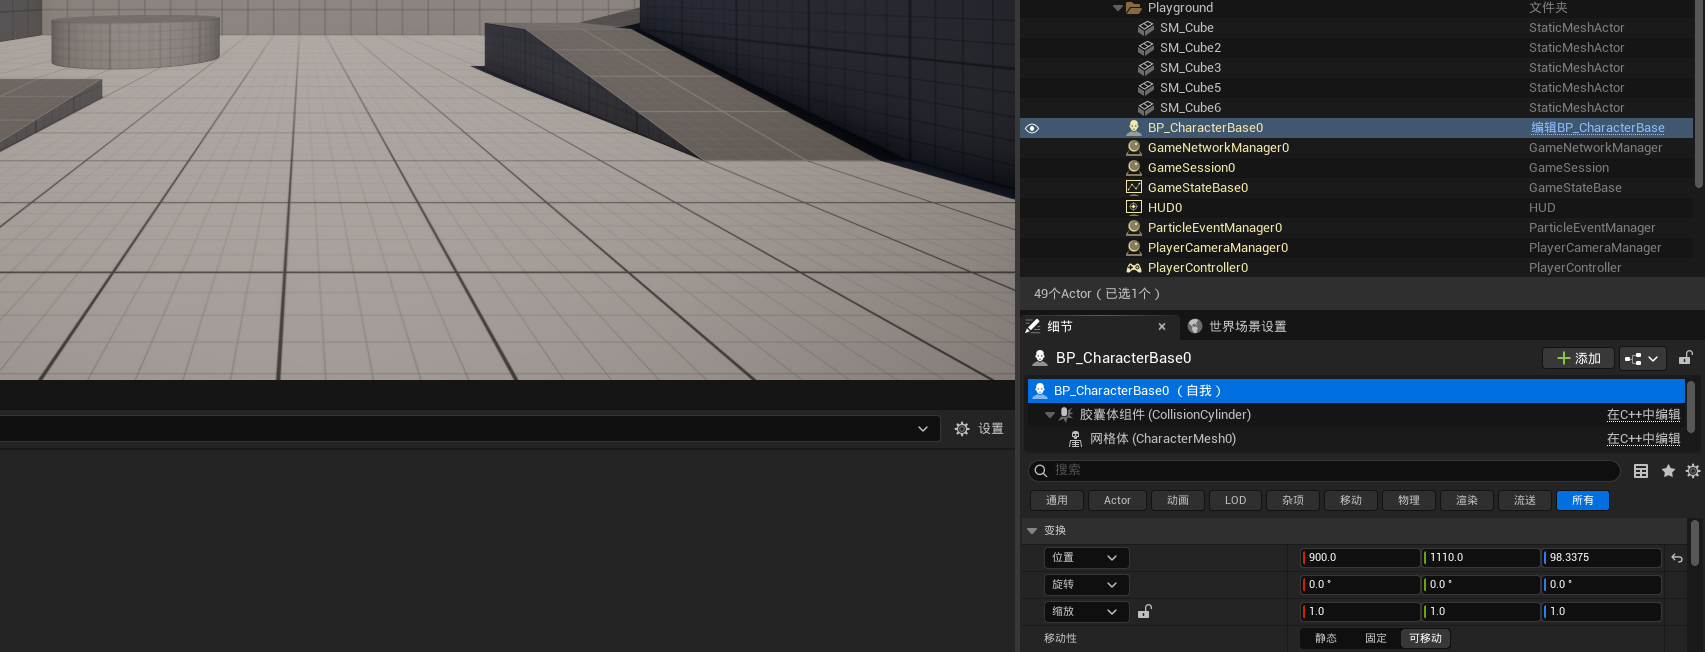
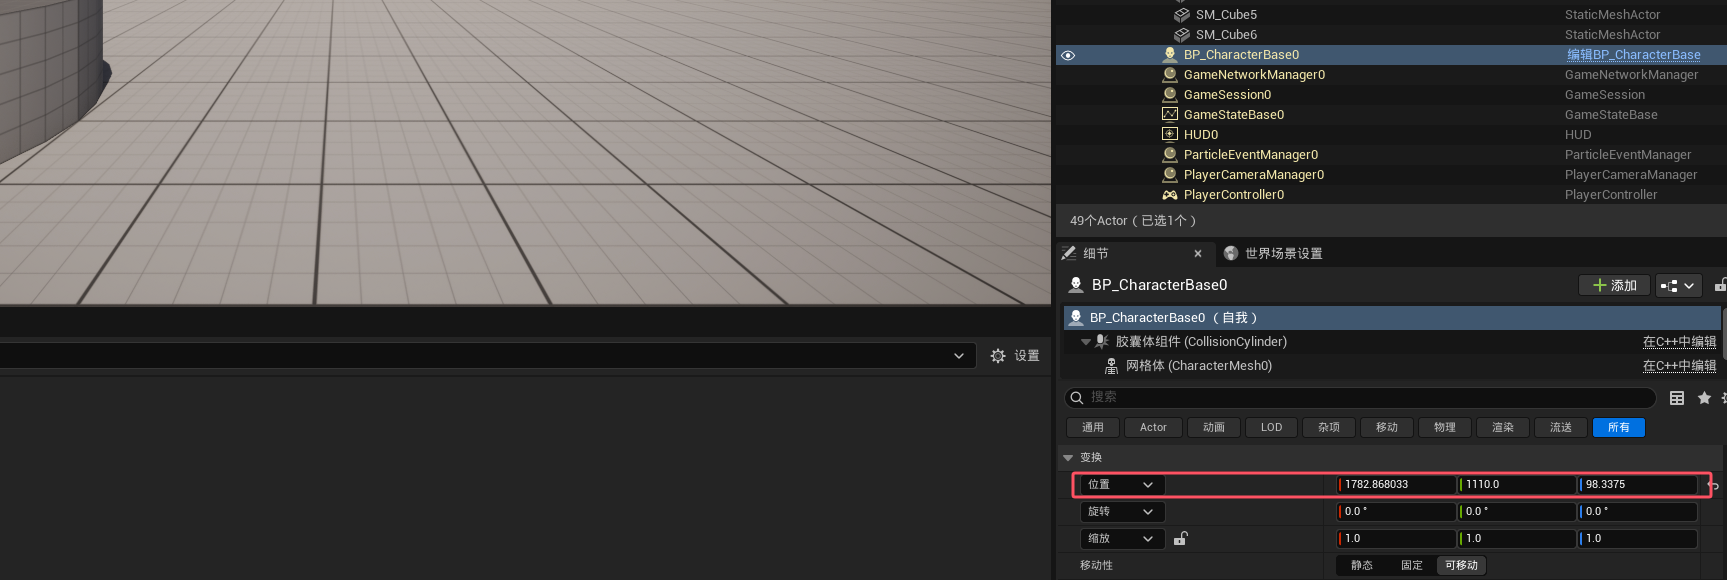
可以观察到,只有X发生了变化,所以移动的逻辑暂时没有太大的问题,现在我们处理一下摄像机,以便我们可以更好的观察
Camera
首先需要确定的是,我们的游戏是一个类似于冒险岛或空洞骑士的横版本2D游戏,所以摄像机应该从侧视角拍摄我们的角色,那么这里会用到两个关键的组件SpringArm和Camera
简单解释一下SpringArm是什么,大致可以把SpringArm看作成一个扛着摄像机的人,控制摄像机从什么位置,什么角度进行拍摄。这也能很好的解释为什么后续代码中,我们实现侧视角拍摄旋转的是SpringArm,而不是Camera本身
首先在CharacterBase.h中添加相应的组件
1 | // 添加SpringArm组件 |
然后在构造函数中完成初始化 1
2
3
4
5
6
7
8
9
10
11
12
13
14
15
16
17
18
19
20
21
22
23
24
25
26
27
28// Sets default values
ACharacterBase::ACharacterBase()
{
// Set this character to call Tick() every frame. You can turn this off to improve performance if you don't need it.
PrimaryActorTick.bCanEverTick = true;
// 初始化胶囊组件
GetCapsuleComponent()->InitCapsuleSize(42.f, 96.0f);
// 设置骨骼网格组件并加载Asset
GetMesh()->SetRelativeLocation(FVector(0.0f, 0.0f, -90.0f));
GetMesh()->SetRelativeRotation(FRotator(0.0f, -90.0f, 0.0f));
GetMesh()->SetSkeletalMeshAsset(LoadObject<USkeletalMesh>(nullptr, TEXT("/Script/Engine.SkeletalMesh'/Game/Characters/Mannequin_UE4/Meshes/SK_Mannequin.SK_Mannequin'")));
// 创建SpringArm和Camera组件,并加入到RootComponent中
SpringArm = CreateDefaultSubobject<USpringArmComponent>(TEXT("SpringArm"));
SpringArm->SetupAttachment(RootComponent);
SpringArm->TargetArmLength = 300.0f;
// 调整拍摄的角度,侧视角,并添加一定的俯视角
SpringArm->SetRelativeRotation(FRotator(-45, -90, 0));
// 创建Camera组件,添加到SpringArm组件之下
Camera = CreateDefaultSubobject<UCameraComponent>(TEXT("Camera"));
Camera->SetupAttachment(SpringArm, USpringArmComponent::SocketName);
Camera->ProjectionMode = ECameraProjectionMode::Orthographic;
Camera->OrthoWidth = 720.0f;
}
现在基础的移动功能就完成了(跳跃其实也是正常的,不过视角问题,而且没有添加动画,所以不太明显)
最终实现
由于使用的是第三人称模板,所以出于方便都是用的3D角色做的实验,现在正式使用PaperZD来实现2D角色(第三方插件),创建一个继承自PaperZDCharacter的类PaperCharacterBase

代码方面变动不大,只需要把骨骼相关的内容删除即可,下面给出完整代码
1 |
|
1 |
|
同样的,需要创建一个继承自PaperCharacterBase的蓝图类BP_PaperCharacterBase,并在GameMode中把默认Pawn修改过来
最后看一下效果(这里我只设置了侧视角,没有设置俯视角)
一些有意思的设定
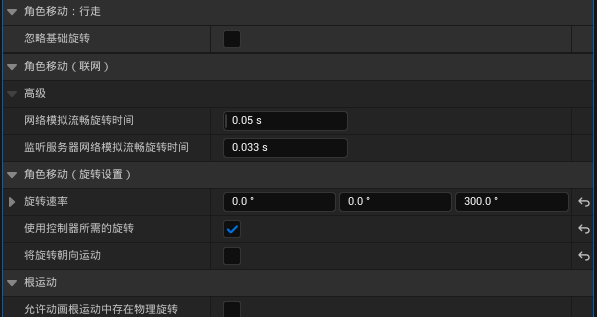
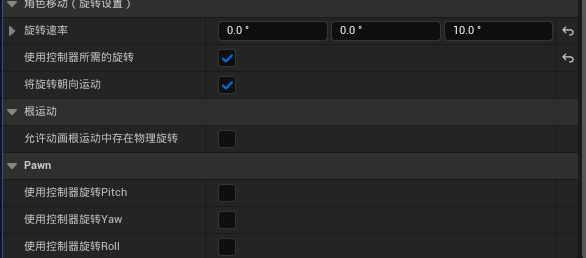
回到默认的第三人称模板(把GameMode中默认Pawn改回去就行),在调设置的时候发现了几个有意思的设定,分别是角色移动组件里的使用控制器所需的旋转(bUseControllerDesiredRotation)和将旋转朝向运动(bOrientRotationToMovement)、Self里的使用控制器旋转YAW(bUseControllerRotationYaw)
如果以上3个选项都不勾选,那么角色的朝向是永远是初始化到游戏场景中的朝向(如果你可以通过某种方式改变控制器正方向的朝向,那么此时,控制器的朝向和角色的朝向是分离的)
例如最开始移动时,角色朝向和控制器正方向是一致的,按W可以往前走。由于第三人称模板提供了IA_Look,可以用鼠标改变控制器的正方向的朝向,所以当我移动鼠标,角色就开始朝不同的方向移动,即使整个过程都只按了W键
将控制器和角色朝向关联起来的关键就是这三个设置,其中使用控制器所需的旋转或使用控制器旋转YAW二者的功能是一致的,当勾选之后,角色朝向会和控制器的正方向绑定
当我移动鼠标时,角色朝向总是与控制器的正方向一致,这就保证了,按下W时总是往角色朝向的方位运动
那么使用控制器所需的旋转和使用控制器旋转YAW有什么区别呢,在使用控制器所需的旋转的描述中有提到
如果该选项为true,那么会应用RotationRate以平滑的旋转,会被
将旋转朝向运动这一选项覆盖,并且需要取消勾选使用控制器旋转YAW
我们勾选使用控制器所需的旋转,然后把旋转速率降低

可以看到旋转的速度是比较缓慢的,尽管我早就已经用鼠标完成了转动的操作
由于勾选使用控制器旋转YAW会覆盖掉这些设置,且功能一致,所以就不单独测试了,接下来直接看将旋转朝向运动的功能即可
这个功能并不会将角色的朝向和控制器的正方向绑定(即移动鼠标角色的朝向不会改变),但它会让角色运动时旋转到运动的方向,可以看到,在我不改变控制器朝向时,分别按下W、D、A,可以观察到角色的朝向改变了(注意这个选项会覆盖掉使用控制器所需的旋转的功能,即控制器的正方向可以改变,但人物朝向不变)
同样的,如果想使用这个功能,应该取消勾选使用控制器旋转YAW
简单总结一下
使用控制器所需的旋转和使用控制器旋转YAW是把角色朝向和控制器正方向绑定
将旋转朝向运动是在运动时改变角色朝向,将其和实际运动的方向绑定
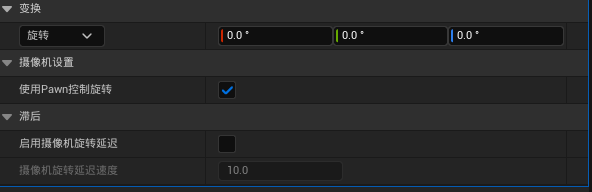
你可能会好奇,第三人称模板不应该是移动鼠标然后旋转摄像机的视角吗,怎么我这里移动鼠标只能改变控制器在水平方向上的旋转,摄像机总是拍摄角色的背部,这就是最后一个设定,SpringArm中的使用Pawn控制旋转(bUsePawnControlRotation)
我们先把之前的几个设定取消勾选,然后开启使用Pawn控制旋转,注意,虽然这里写的是摄像机设置,但实际是SpringArm中的选项,而不是摄像机中的(摄像机也有相同的选项)
当然,由于关闭了之前的三个选项,所以控制器的正方向和角色朝向不是一致的
所以要实现正确的第三人称视角就有两种组合,使用Pawn控制旋转 + 使用控制器所需的旋转和使用Pawn控制旋转 + 将旋转朝向运动,它们的区别就在于朝不同的方向移动时,角色是否会面向这个方向
简单看一下效果,首先是Pawn控制旋转 + 使用控制器所需的旋转组合,可以看到,角色朝向会随着我移动鼠标变化,但当我按A和D时,角色并没有转向运动的方向,但如果我只按W,用鼠标改变控制器正方向时,一切都很正常,因为此时角色的朝向与控制器的正方向绑定,所以OK
现在我们看看Pawn控制旋转 + 将旋转朝向运动的组合,最大的区别就在于,不产生运动时,角色的朝向并不会改变,但我按A和D时,角色会转向运动的方向,并且最后我只按W,用鼠标改变控制器正方向时,也是正常的,所以这个组合可以看作一个满血的第三人称控制,那么Pawn控制旋转 + 使用控制器所需的旋转组合有什么用途呢,假设我们的游戏提供了一个AutoRun的功能,此时玩家便无需按W、A、S、D控制角色运动,只需要移动鼠标控制方向即可